Table of Contents
Advertisement
Advertisement
Table of Contents

Summary of Contents for XtremeAIR PX01-W30
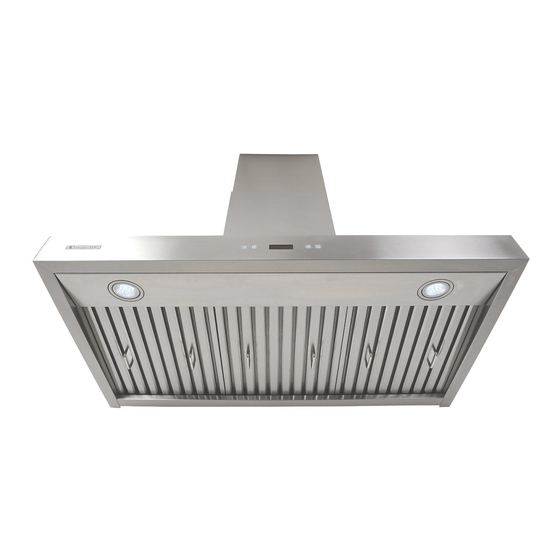
- Page 1 INSTALLATION GUIDE & USER’S MANUAL PRO-X SERIES Wall Mount Range Hood Models: PX01-W30, PX01-W36 PX02-W30, PX02-W36 PX03-W30, PX03-W36 PX04-W30, PX04-W36 PX04-W42 IMPORTANT: READ AND SAVE THESE INSTRUCTIONS FOR RESIDENTIAL & INDOOR USE ONLY www.XtremeAirUsa.com PAGE...
-
Page 2: Table Of Contents
OTICE possible problems and situations that might occur. Please also use common sense and caution when installing, maintaining or operating this or any other appliances. Please always contact the XtremeAir USA, LLC. Customer Support Team at 1-714-554-9000 or email: support@XtremeAirUsa.com with any problems or situations that you do not understand or confuse. -
Page 3: Important Safety Instructions
IMPORTANT SAFETY INSTRUCTIONS- continue WARNING - TO REDUCE THE RISK OF FIRE, ELECTRIC SHOCK, OR INJURY TO PERSONS, OBSERVE THE FOLLOWING: Use this unit only in the manner intended by the manufacturer. If you have questions, contact the manufacturer PRODUCT: Do not remove permanently affixed labels, warnings, or plates from the product. This may void the warranty. -
Page 4: Height & Clearance Requirement
HEIGHT & VENTING REQUIREMENT CLEARANCE IMPORTANT: • NEVER exhaust air or terminate duct work into spaces between walls, crawl spaces, ceiling, attics or garages. All exhaust must be ducted to the outside. • Hood mounted too low could result in heat damage and fire hazard; while hoods mounted too high will be hard to reach and will loose its performance and efficiency. -
Page 5: Electrical Requirement
ELECTRICAL REQUIREMENTS: IMPORTANT: Observe all governing building codes and city ordinances. ■ A 120 volt, 60 Hz., AC only, 15-amp, fused electrical circuit is required. It is the customer’s responsibility: • To contact a qualified electrical installer. • To assure that the electrical installation is adequate and in conformance with National Electrical Code, ANSI/ NFPA 70 —... -
Page 6: Range Hood Dimensions & Installation Overview
HOOD DIMENSIONS & INSTALLATION OVERVIEW: PX02-W30 PX01-W30 PX02-W36 PX01-W36 PX04-W30 PX03-W30 PX04-W36 PX03-W36 www.XtremeAirUsa.com PAGE... -
Page 7: Installation
INSTALLATION Step 1 Step 1 STEP 1: (OPTIONAL ONLY) Protect the cook top & create work station • Have 2 piece of wood stub about 2” x 4” x 20” on both sides of stove and a plywood on top of them to protect cook top or stove from damage or dirt. - Page 8 Step 5 STEP 5: Hang the hood and connect 1. Carefully hang the hood body on the wall, attaching it to the 2 screws already in place. 2. Level the hood body by using horizontal level 3. Use hand screw driver to tight those 2 mounting screws 4.
- Page 9 STEP 7: Install chimney Step 7 1. Take off outsider chimney protective laminate coating (not the inner chimney) 2. Place both the chimney on top of range hood base 3. Make sure the chimney is facing the correct direction; *PX02: outside chimney; screw hole on the bottom Inside chimney;...
-
Page 10: Range Hood Operation
RANGE HOOD OPERATION BEFORE YOU BEGIN (important): this machine is equipped with TOUCH SENSITIVE CONTROL, so please 1. DO NOT PRESS. Only TOUCH & HOLD DOWN 2 SECONDS for every change makes. 2. TOUCH A WHOLE BUTTON only, please see below picture wrong vs. right WRONG RIGHT WRONG: Only half of a button... - Page 11 Activating Smoke Detector Function: • While the machine is off, touch Auto Function button to activate the smoke detector auto function mode NOTE: this function will only worked when there’s a lot of smoke. Once this button is touched, all other buttons are not active.
-
Page 12: Specification
B. Adjusting blower speed: * Touch and hold down (+) for increase * Touch and hold down (-) for decrease C. Turning off the blower: *Touch and hold down power sign (1) for 1-2 seconds D. To turn the light ON/OFF: * Touch Light button once to turn on the lights, and once again to turn off the lights. -
Page 13: Trouble Shooting
TROUBLE SHOOTING If the range hood or lights does not operate after installation: • Check if the range hood has been plugged in, make sure that all power has been turned back ON, the fuse is not blown and all electrical wiring is properly connected. •... -
Page 14: Use & Care
USE & CARE INFORMATION: Operations: • Read and understand all instructions and warnings in this manual before operating the appliance. Save these instructions for future reference. • Always leave safety grills and filters in place. Without these components, operating blowers could catch on to •...


