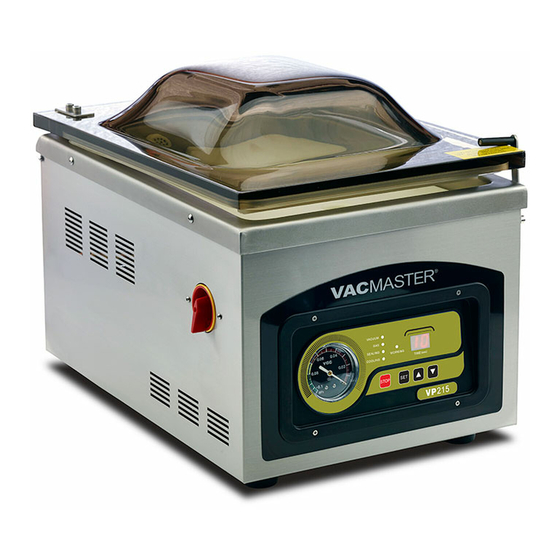
Summary of Contents for Vacmaster VP215
- Page 1 Models: User’s Manual VP215 (110V) VP215EU (220-240V) Register your product and get support at www.VacMasterFresh.com v.2015-04.09...
-
Page 2: Table Of Contents
® Sealer. You are about to use one of the most powerful vacuum sealers available. With the help of the VP215, you will now be able to keep food fresh for longer in the refrigerator, freezer or pantry. The VP215 effectively removes air and extends freshness up to five times longer than traditional methods. -
Page 3: Safeguards
VP215 Chamber Vacuum Sealer: ® 1. Read all instructions in this User’s Manual before use. 2. Do not use the VP215 near a heat source or on a wet or hot surface. 3. To protect against electrical shock, do not immerse any part of the vacuum sealer plug or power cord in water or any other liquid. - Page 4 • Follow all food safety regulations as outlined by the FDA at www.FDA.gov. • Use only VacMaster Vacuum Chamber Pouches and ® accessories. • Some fruits and vegetables may release gases, known as outgassing.
- Page 5 Features of the VP215 1. Seal Pad 2. Lid Gasket 3. Power Switch 4. Vacuum Chamber 5. Filler Plates - Used to occupy space in the chamber. The plates allow for faster vacuum. When more space is occupied, there is less air to be removed from the chamber.
- Page 6 Control Panel of the VP215 1. Vacuum Gauge- Indicates the vacuum level inside the chamber. Function Lights: Vacuum - Illuminates to adjust vacuum time as well as during the vacuum process. During set up, adjust the vacuum time using the UP/DOWN Buttons.
- Page 7 Housing Glass Cabinet 1. Prepare the oil - The VP215 includes a maintenance kit that contains a ½ quart of oil and an empty oil bottle with spout. Fill the empty oil bottle with oil. 2. Remove the back panel - Using the enclosed Phillips head screwdriver, remove the four screws from the back panel and take the panel off the machine.
- Page 8 LED Screen on the control panel will illuminate showing a symbol. Set Up - Adjusting the VP215 Timing Controls Note: All timing adjustments must be made with the lid lock off and the lid open. To adjust/set the timing controls, press the SET button on the control panel until the required label (Vacuum, Sealing or Cooling) is illuminated.
-
Page 9: Tips
SET button until COOLING is illuminated and then use the UP/ DOWN buttons to adjust the cooling time accordingly. Note: The VP215 settings will always default to the most recently used settings on the machine. To prolong the life of your seal bar, set the cooling time to twice TIP: the sealing time. - Page 10 Allow 1” to 2” of extra headspace at the top of the pouch to ensure a quality, air-tight seal. The VP215 accepts vacuum chamber pouches up to 10”W x 13”L in size. 2. Fill the pouch and place inside the chamber Fill the pouch with the product to be vacuum packaged and place the pouch inside the chamber.
- Page 11 Use the VP215 Chamber Vacuum Sealer 4. Inspect the pouch When the lid opens, remove and inspect the pouch. Vacuum confirmation - Check the quality of the vacuum by looking at the tightness of the pouch and the product. Look for air pockets or air leaks.
-
Page 12: Troubleshooting
Turn the machine back on and it should return to working order. VP215 does not pull a complete vacuum with pouch - • The vacuum time may not be set high enough. Set the vacuum time higher and vacuum again. -
Page 13: Cleaning And Care
Wipe the gasket clean. c. Wipe the seal area clean. • Do not store the VP215 outside. • DO NOT use any acetone-based or abrasive cleaners on the lid or other plastic parts. Only clean lid with a damp cloth and mild soap. -
Page 14: Vacuum Packaging Guidelines
Vacuum Packaging Guidelines • Follow all food safety regulations as outlined by the FDA at www.FDA.gov. • Vacuum packaging is NOT a substitute for canning. • Vacuum packaging cannot reverse the deterioration of foods. • Vacuum packaging is NOT a substitute for refrigeration or freezing. - Page 15 Parts Information Description Part Number Lid Screws Upper Plate for Lid 979201 Lower Plate for Lid Lid Gasket 979425 Holder for Seal Pad 979225 Seal Pad (Brown) 979226 www.VacMasterFresh.com • 800-821-7849...
- Page 16 Parts Information www.VacMasterFresh.com • 800-821-7849...
-
Page 17: Parts
Cable Plug Screw VacMaster Panel Decal 979130 Vacuum Gauge 979126 Control Mounting Panel 979125 Control Panel Decal 979122 Settings Decal 979122 Decal Model VP215 979122 Circuit Board 979129 Lid Latch 979170 Control Cable 979242 Motor Spring Support 979217 Bottom Housing... - Page 18 Parts Information Description Part Number Chamber Vac Port (White) Plate Assembly Hinge Pin Spring Hinge Roller Pin Hinge Connecting Eye Hexagon Hinge Stop Roller Bumper Hinge Screw Plate Lid Pressure Mount for Micro Switch Micro Switch 979255 Lid Spring Spring Adjustment Eye Piston for Seal Bar (large) 979380 Hose for Piston...
-
Page 19: Limited Warranty
Limited Warranty ARY, Inc., a distributor and manufacturer of vacuum packaging and other machines (collectively, the “Goods”), extends to the purchaser of the Goods a Limited One Year Warranty, from the receipt of the Goods, under terms and conditions set out herein. - Page 20 ARY Inc. ARY, Inc. P.O. Box 412888 Kansas City, MO 64141 www.VacMasterFresh.com 800.821.7849 All Rights Reserved. VACMASTER and VacStrip are trademarks or registered ® ® trademarks of ARY, Inc. in the United States and other countries. v.2015-04.09...


