Advertisement
Advertisement
Table of Contents

Summary of Contents for Nady Systems U-1100
- Page 1 U-11OO / 21OO UHF Wireless Microphone System OWNER’S MANUAL...
-
Page 2: Table Of Contents
Thank you for choosing the Nady U-1100/2100 wireless system, and congratulations on your choice. The Nady U-1100/2100 wireless system has the best performance and price value in pro- fessional UHF wireless, offering clear-channel, frequency-agile operation on the UHF band for interference-free performance in any application or locale. -
Page 3: System Features
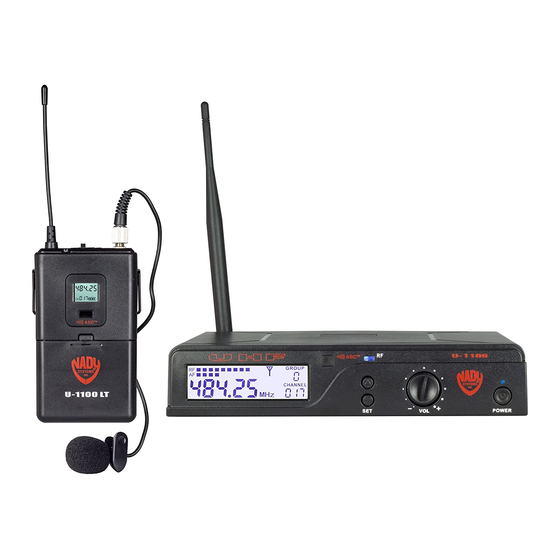
• Choice of transmitters: U-1100HT handheld mic or U-1100LT bodypack—Lavalier (LT), Head- mic™ (HM), or U-1100GT instrument (GT) • Optional RMT-1KUD available for rackmounting single or dual U-1100/2100 receivers U-1100 Handheld Mic Transmitter • Touch buttons for On/Off power and Mute allow convenient audio muting with the transmitter • LCD display (with backlighting) including Channel and Frequency Selected, Battery Level... -
Page 4: Quick User Control Guide
QUICK USER CONTROLS GUIDE U-1100/U-2100 Receiver: Front View U-1100/U-2100 Receiver: Back View U-1100 HT U-1100 LT/GT Transmitters... - Page 5 RF and antenna reception in the area. AF LCD indicates receiving audio signal level. LCD DISPLAY (backlighted) displays the selected channel from 00-99 in numerical format, and frequency (U-1100 displays Frequency MHz), RF/AF bar graph level display U-1100/U-2100 Receiver Back 8.
-
Page 6: System Operation
1 second. The receiver will turn off. All the LEDs will be turned off, indicating the receiver is off. At power off the U-1100/2100 receiver will store the last selected channel and re-display them at power on. It can be reprogrammed to any new channel. The default factory setting is 01 for channel A, and 50 for channel B. - Page 7 RF/AF LCD, RF LED Indicators The U-1100/2100 receiver has a RF LCD indicator (6) if full bars, indicating strong incoming RF signal to the receiver. When the RF signal is weaker, it displays fewer bars or no bars when the TX is off or no reception at all.
- Page 8 Your U-1100/2100 receiver is now in operational state and ready to use. Proceed to the following instructions for the U-1100HT handheld microphone transmitter or U-1100LT/HM or GT bodypack transmitter included with your system.
- Page 9 install the batteries, Unscrew, and then slide down the Battery Cover (21), exposing the Battery Compartment (20). Insert two fresh AA batteries according to the polarity indicated on the transmitter body. Slide the battery cover back onto the microphone, making sure it is secure. Fresh alkaline batteries can provide up to 8-10 hours of operation, but in order to ensure optimal performance it is recommended that the batteries be replaced after 6-8 hours of use or as indicated necessary by the backLighted and an empty battery icon on the LCD DISPLAY (17).
- Page 10 (At the same time the MUTE LED DISPAY (24) turn red) and ON indicates the TX is on and the audio is un-muted. The MUTE LED DISPAY (24) turns off for normal operation. Operating the U-1100 Bodypack Transmitter To turn on the transmitter, slide the POWER SWITCH (25) to the MUTE position. The TX is turned on, the audio is muted and the MUTE LED DISPLAY (24) lights up.
- Page 11 Note: The audio level should be adjusted on the instrument as when using a hard-wired cord. Programming the U-1100 Bodypack to the Selected Channel The transmitter must be programmed to the same frequency as selected on the receiver via automatic synchronization using the IR ASC ™...
-
Page 12: Cautions And Troubleshooting
repeat the procedure in a darker location or somehow shield the link from outside light to successfully program the transmitter with the pre-programmed group and channel info from the receiver. Manually Programming If, in a very bright light situation, the IR ASC™ Sync function does not work, manual channel selection is preferred. -
Page 13: Miscellaneous Tips
Selecting the U-1100/2100 Receiver Channel. With the associated transmitter off, scroll through the channels to find one that shows no received signal on the receiver’s RF LCD INDICATOR (6). Also, neither of these LCD/LEDs should be lit on each of the three immediately adjacent channels both above and below the selected channel for optimal interference-free operation (i.e. -
Page 14: Specifications
Power requirement: 13.5VDC/0.4A Antennas: Dual removable swivel BNCantenna Dimensions: 8”W x 6”D x 1.25”H (20.4cm x 15.3cm x 3.2cm) Weight: U-1100 17.9oz (556.8g)/U-2100 15.1oz (469.7g) Housing Construction: ABS Plastic U-1100HT Handheld Transmitter RF Output power: +14dBm (25mW typical)/50Ω Harmonic/Spurious emission:... -
Page 15: Frequency Plan
RF Output power: +14dBm (25mW typical) /50Ω Harmonic/Spurious emission: -50dBc normal Input Impedance: 5kΩ (Lavaliere); 500kΩ (Instrument) Controls: Power OFF/ON, MUTE Input Connector: locking 3.5mm mini-jack LCD/LED Display: Channel/Frequency, BATT status, Mute LED Antenna Type: External attached Battery Type: 2 x AA alkaline or NiMH Battery life: 8-10 Hours typical, alkaline Dimensions:... -
Page 16: Optional Accessories
Nady Systems. Please do not return your Nady product to the store where it was purchased as Nady Systems handles your warranty service directly. Communication with our Service Department is the most efficient means of servicing your unit and we are dedicated to keeping you a satisfied customer. -
Page 17: Service Information
3) Per the above, Nady will perform all warranty service and return the unit to you at no charge. Nady Systems will inform the buyer if product sent in does not meet the terms of this warranty and will provide a quote for fixing the unit and/or shipping it back exclusively at the buyer’s expense. - Page 18 www.nady.com...


