Table of Contents
Advertisement
Quick Links
999-6897=-000
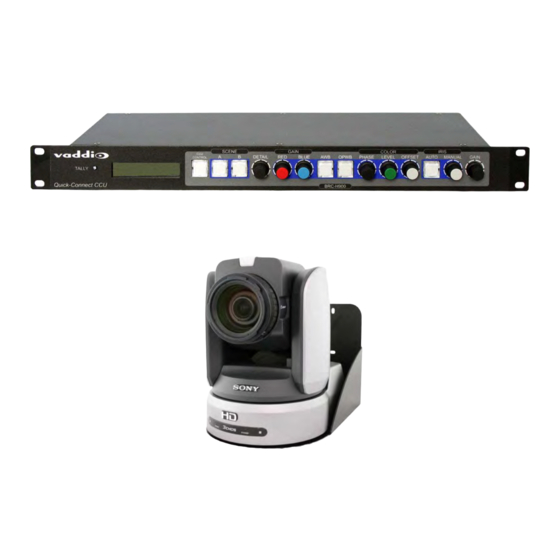
Vaddio™ Quick-Connect™ CCU H900 Kit for the Sony® BRC-H900
Camera
(camera not included)
(camera Included)
Part Numbers without Camera:
998-6897-000: Quick-Connect CCU Kit for the BRC-H900 Camera (camera not included) - North America
998-6897-001: Quick-Connect CCU Kit for the BRC-H900 Camera (camera not included) - International
Part Numbers with Camera:
999-6897-000: WallVIEW CCU H900 System (Camera Included) - North America
999-6897-001: WallVIEW CCU H900 System (Camera Included) - International
© 2012 Vaddio - All Rights Reserved. Specifications are subject to change without prior notice. Document Number 342-0507 Rev A
Installation and User Guide
and the WallVIEW™ CCU H900
Advertisement
Table of Contents

Summary of Contents for VADDIO Quick-Connect CCU H900
- Page 1 Part Numbers with Camera: 999-6897-000: WallVIEW CCU H900 System (Camera Included) - North America 999-6897-001: WallVIEW CCU H900 System (Camera Included) - International © 2012 Vaddio - All Rights Reserved. Specifications are subject to change without prior notice. Document Number 342-0507 Rev A...
- Page 2 Quick-Connect CCU Kit for BRC-H900 Camera Inside Front Cover - Blank © 2012 Vaddio - All Rights Reserved. Document Number 342-0507 Rev A Page 2 of 16...
-
Page 3: Table Of Contents
Compliance and CE Declaration of Conformity - Quick-Connect CCU and EZIM CCU ........13 Appendix 1: Cable Pin-outs for the Quick-Connect CCU System ................14 © 2012 Vaddio - All Rights Reserved. Document Number 342-0507 Rev A Page 3 of 16... -
Page 4: Overview
Read and understand all instructions and warranty statements before using. Do not operate any device if it has been dropped or damaged. In this case, a Vaddio technician must examine the product before operating. To reduce the risk of electric shock, do not immerse in water or other liquids and avoid extremely humid conditions. -
Page 5: Information
Information: For RS-232 control information, please see the full-length Technical Manual for the Sony BRC-H900. This manual can be found either on the Sony or the Vaddio website. Unpacking: 998-6897-000: Quick-Connect CCU Kit (NO CAMERA) for the BRC-H900 Camera - North America Carefully remove the device(s) and all parts from the packaging. -
Page 6: Anatomy Of The Ccu Controlled Camera System
Manual Iris: The manual iris control allows the user to set the iris manually. Gain: The Gain control adjusts the overall gain of the camera. To manually adjust the gain Auto Iris must be off. © 2012 Vaddio - All Rights Reserved. Document Number 342-0507 Rev A Page 6 of 16... -
Page 7: Image: Rear Panel Connections And Controls (Left To Right)
Video RJ-45: This RJ-45 receives the camera’s four (4) differential video signals from the EZIM CCU to the Quick-Connect CCU on Video Cat-5 cable. © 2012 Vaddio - All Rights Reserved. Document Number 342-0507 Rev A Page 7 of 16... -
Page 8: Image: Ezim Ccu Top Panel (Left To Right) And Iso View Of Ezim Ccu
If the camera is connected to a third-party control system (such as AMX or Crestron), a DB-9 to RJ-45 control adapter cable is supplied. Please do not use “pass-thru” type RJ-45 connectors. The Vaddio Cat-5 wiring standard uses pins 7 and 8 on both the video and the control Cat-5e cables. The pass-through connectors have proven to provide insufficient connectivity for these important signals. -
Page 9: Step By Step Mounting Instructions
12 VDC Power on EIAJ-04 RS-232 on 8-pin Mini Din-M DB-25-M CVBS on plugs into BNC-M EZIM CCU G/L on BNC-M YPbPr on DE-15-M © 2012 Vaddio - All Rights Reserved. Document Number 342-0507 Rev A Page 9 of 16... -
Page 10: Drawing: Basic System Connectivity
G/L (where applicable) to the camera. These Cat. 5 cables can be run up to 500’ (152.4m). See Appendix 1 for wiring and pin-out information. NOTE: Daisy-Chain configurations are not supported. © 2012 Vaddio - All Rights Reserved. Document Number 342-0507 Rev A Page 10 of 16... -
Page 11: Completing The Installation
Completing the Installation: Connect the Power Cat-5 cable to the CCU and connect the Vaddio 36 VDC power supply to an AC outlet. Power will travel down the Power Cat-5 cable to the EZIM CCU, powering the camera. The camera will “Home”... -
Page 12: Warranty Information
Vaddio Customer Service: Vaddio will test, repair, or replace the product or products without charge if the unit is under warranty and is found to be defective. If the product is out of warranty, Vaddio will test then repair the product or products. The cost of parts and labor charge will be estimated by a technician and confirmed by the customer prior to repair. -
Page 13: Compliance And Ce Declaration Of Conformity - Quick-Connect Ccu And Ezim Ccu
Operation is subject to the following two conditions: (1) This device may not cause interference, and (2) This device must accept any interference including interference that may cause undesired operation of the device. Changes or modifications not expressly approved by Vaddio can affect emission compliance and could void the user’s authority to operate this equipment. -
Page 14: Appendix 1: Cable Pin-Outs For The Quick-Connect Ccu System
Signal _______ SD_______________HD______ CVBS + CVBS + CVBS GND CVBS GND 12345678 C GND PB GND Y GND Y GND Not Used Not Used © 2012 Vaddio - All Rights Reserved. Document Number 342-0507 Rev A Page 14 of 16... - Page 15 GND - Y/Y GND - PWR GND - PWR GND - PWR 12V - PWR 12V - PWR 12V - PWR 12V - PWR © 2012 Vaddio - All Rights Reserved. Document Number 342-0507 Rev A Page 15 of 16...
- Page 16 ©2012 Vaddio - All Rights Reserved. Reproduction in whole or in part without written permission is prohibited. Specifications and pricing are subject to change without notice. Vaddio, Quick-Connect, HSDS, EZCamera, ProductionVIEW, EZIM and PowerRite are trademarks of Vaddio. All other trademarks are property of their respective owners.


