Sign In
Upload
Download
Table of Contents
Contents
Add to my manuals
Delete from my manuals
Share
URL of this page:
HTML Link:
Bookmark this page
Add
Manual will be automatically added to "My Manuals"
Print this page
×
Bookmark added
×
Added to my manuals
Manuals
Brands
Valcom Manuals
Speakers
V-1020C
Installation manual
Valcom V-1020C Installation Manual
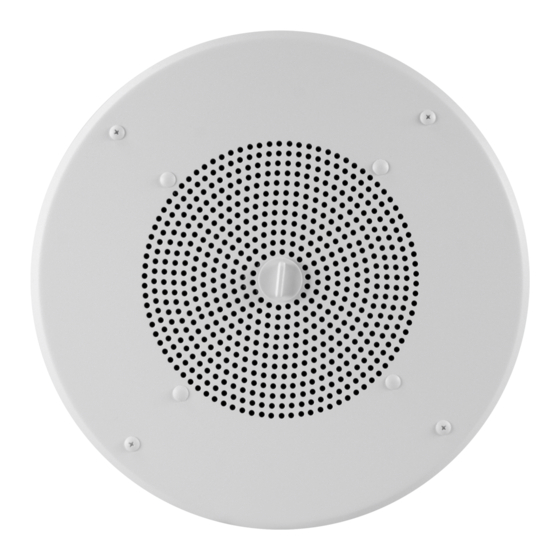
8" ceiling speaker
Hide thumbs
Also See for V-1020C
:
Installation manual
(13 pages)
,
Technical specifications
(2 pages)
,
Installation instructions
(4 pages)
1
2
3
4
5
6
7
8
9
10
11
12
13
Table Of Contents
14
page
of
14
Go
/
14
Contents
Table of Contents
Bookmarks
Table of Contents
Required Tools for Installation
Cut a Pre-Measured Hole in the Ceiling Tile
Determine the Screw Holes for the Ceiling Tile
Align the Speaker with the Holes in the Ceiling Tile
Align the Speaker with the Bridge on Either Side of the Ceiling Tile
Attach All Three Pieces with the Provided Hardware
Connect All Wiring to the Screw Cages on the Speaker
Place the Speaker Assembly in the Ceiling Grid
Lower the Speaker Assembly into Position in the Ceiling Grid
Insert the Included Volume Control Knob and Adjust the Speaker Volume
Adjust the Speaker Volume with a Flat Blade Screwdriver
Advertisement
Quick Links
1
Connect All Wiring to the Screw Cages on the Speaker
Download this manual
Table of
Contents
Previous
Page
Next
Page
1
2
3
4
5
Advertisement
Table of Contents
Related Manuals for Valcom V-1020C
Speakers Valcom V-1020C Installation Manual
8" ceiling speaker with bridges (13 pages)
Speakers Valcom V-1010C Installation Instructions
Amplified ceiling speakers (4 pages)
Speakers Valcom V-1010C Installation Instructions
Amplified ceiling speakers (4 pages)
Speakers Valcom V-1020C Technical Specifications
Amplified ceiling speaker (2 pages)
Speakers Valcom V1016 Installation Instructions
One way amplified interior wall speakers (3 pages)
Speakers Valcom V1016 Brochure
Traditional wall speakers (1 page)
Speakers Valcom V-1022C Technical Specifications
Wall mounted one-way speaker (2 pages)
Speakers Valcom V-1022C Technical Specification
One-way wall speaker (2 pages)
Speakers Valcom V-1023C Technical Specifications
Wall mounted one-way speaker (2 pages)
Speakers Valcom V-1024C Technical Specifications
Corner wall mounted one-way speaker (2 pages)
Speakers Valcom V-1025C Technical Specifications
Corner wall mounted one-way speaker (2 pages)
Speakers Valcom V1016 Brochure
Traditional wall speakers (1 page)
Speakers Valcom V-1026C Technical Specifications
Bi-directional one-way corridor speaker (2 pages)
Speakers Valcom V-1027C Technical Specifications
Bi-directional one-way speaker (2 pages)
Speakers Valcom SIGNATURE V-1420 Installation Instructions
Signature series high fidelity amplified ceiling speaker (2 pages)
Speakers Valcom InformaCast VL520BK-F-IC Manual
Compliant ip compact speaker with text (4 pages)
Summary of Contents for Valcom V-1020C
Page 2
Required tools for installation of a V-1020C speaker with V-9914 bridge.
Page 3
First, cut a pre-measured hole in the ceiling tile.
Page 4
Using the bridge as a guide, determine the screw holes for the ceiling tile.
Page 5
Align the speaker with the holes in the ceiling tile.
Page 6
Align the speaker with the bridge on either side of the ceiling tile.
Page 7
Attach all three pieces with the provided hardware.
Page 8
Connect all wiring to the screw cages on the speaker.
Page 9
Place the speaker assembly in the ceiling grid.
Page 10
Lower the speaker assembly into position in the ceiling grid.
Page 11
Insert the included volume control knob and adjust the speaker volume...
Page 12
...or adjust the speaker volume with a flat blade screwdriver.
Table of Contents
Print
Rename the bookmark
Delete bookmark?
Delete from my manuals?
Login
Sign In
OR
Sign in with Facebook
Sign in with Google
Upload manual
Upload from disk
Upload from URL